-
Canvas Hiking Backpack Buying Guide for Outdoor Beginners
Canvas backpacks have become some of the essentials on hiking checklists. These rugged and versatile backpacks can hold everything needed for a weekend adventure. In fact, choosing the right backpack can make every step feel comfortable and fulfilling.
However, choosing the ideal canvas hiking backpack can be overwhelming for beginners, given the numerous options. Thankfully, I’m here to share my experience of choosing a backpack that ticks critical boxes like comfort, durability, and versatility. Read my full guide below:
Why Choose a Canvas Hiking Backpack?
There are several reasons why I like taking my canvas backpack on hiking trips. First, these bags are made from highly durable materials. They can easily withstand rough terrains without tearing or scratching. My 3-year-old canvas backpack still looks neat despite the frequent outings.
Other reasons to choose a canvas hiking backpack include:
- Comfortable shoulder straps that reduce fatigue and strain.
- These bags are popular for their generous storage capacity.
- Multiple storage compartments for increased versatility.
- They offer timeless style that remains appealing for years.
Key Features Beginners Should Look For
A canvas backpack for outdoor hiking must have several essential features. The last thing you want is a bag that wets your belongings or crumbles under pressure. Here are the tips to choose a backpack for your next hiking challenge:
Material & durability
A good canvas hiking backpack material must balance lightness and durability. Lighter materials like canvas and nylon can reduce the bag’s weight. Heavy-duty materials such as ballistic nylon can even last for decades. However, you may have to pay more for light and durable materials.
Capacity & size
Always choose the right capacity depending on the activity. 30-80 liters should be enough to handle multi-day trips, such as weekend hiking adventures. For single-day adventures, go for anything between 20 and 35 liters. Most importantly, ensure the bag can carry all your essentials.
Ventilation
Most beginners overlook this feature when choosing an outdoor backpack. I recommend choosing a backpack with a breathable mesh panel on the back to help combat sweat. Improved airflow can also keep your back cool during those long hiking trips.
Comfortable Straps
When choosing a hiking backpack, always focus on comfort. A good hiking backpack must have padded shoulder straps to distribute the weight evenly across your shoulders. Also, make sure the straps are adjustable to customize the backpack’s fit and position.
Storage Compartments
I prefer outdoor backpacks with multiple storage compartments for my water bottles and maps. These pockets are often easy to reach when wearing the backpack. A versatile choice should also have a sleeping bag compartment and attachment points for things like an ice axe and trekking poles.
Canvas vs Synthetic Backpacks: What Beginners Should Know
Before calling it a day, let me help you choose the right material for a canvas hiking backpack. Hiking backpacks are often made of canvas and synthetic materials, each offering its pros and cons. Synthetic material, in this case, may mean nylon or polyester.
Here’s the thing: canvas is made of tightly woven fibers, giving it a sturdy construction that can withstand any hiking condition. Synthetic materials like nylon, on the other hand, are lightweight and affordable, though they may lack the aesthetic appeal of canvas.
So, if you’re after durability and style, canvas backpacks should give you that with proper care. The natural fibers of canvas are also breathable, which increases comfort. And yes, these backpacks are available at various price points. I hope this helps!
-
How to Choose the Perfect Band for Your Apple Series 8 Watch
You’ve just purchased the exciting new Apple Series 8 smartwatch, but now it’s time to choose the bands that best match your personal taste and lifestyle. With the wide variety of apple series 8 watch bands available, picking the right options involves assessing your needs across a few key factors:
Considering Lifestyle and Activities
Analyze how you plan to use your Apple Watch daily when considering band materials. For example:
- Active users who swim or exercise heavily should prioritize flexible, waterproof silicone bands that stand up to sweat and moisture without damage. Need a high quality, workout-friendly silicone band, buy a high quality shark apple watch band
- Professionals wanting luxury style for work should choose stainless steel, ceramic or quality leather bands aligning with their personal brand.
- Frequent typists would benefit from soft, cushioned bands reducing wrist strain over long durations.
Evaluate your unique habits and align bands accordingly.

Matching Personal Style Preferences
Beyond purely practical performance considerations related to professional, fitness or casual settings, bands showcase personal style tastefully. Decide if versatile bands accommodating multiple environments sufficiently or bands swapped to match changing situations better suit your fashion preferences minimizng unnecessary damage consistently wearing one favorite everywhere without thoughts protecting integrity and longevity.
Comfort and Ideal Fit
Trying different band sizes and materials on in person determines ideal fit aligning wrist contours comfortably without digging into skin or sliding around loosening inconveniently. Well fitted Apple Watch bands feel like natural extensions moving smoothly during motions not distractions noticed negatively impacting comfort continually.
Seeking Durable and Low Maintenance Options
Research specific band materials durability and care/cleaning needs, as options like stainless steel or ceramic resist damage over years if treated properly. But luxury aesthetics come at higher costs typically.
Staying Within Budget
Weighing personal style desires against wallet considerations, plenty quality third party bands offer stylish options under Apple’s pricing substantially. Browse options across price tiers aligning to budgets wisely.
By self analyzing honest lifestyle and style preferences, then layering insights pragmatically across ideal comfort, durability and reasonable affordability factors related, uncovering versatile high-value Apple Series 8 bands satisfying every scenario arises with some thoughtful effort upfront. Happy hunting!
-
Foodies In Training – Crepes
So Saturday night I made my first attempt at Crepes. Kyle took the kids to Home Depot to keep them out of my hair and while there decided to up the testosterone levels in our house by about 10 notches and brought home a chain saw. Fortunately, we didn’t need the chain saw for my crepes.
The whole night was a bit of an experiment, but isn’t that what these Foodie Nights are for? I decided to prep all the toppings first and then make the crepes right before we sat down to eat. We made three savory ones and then sampled them and then went back for whatever seconds we wanted to try out. The first savory one was scrambled eggs, white cheddar, bacon, red pepper and chives. Very tasty and Kyle’s favorite savory.
The second was filled with ham, asparagus and Swiss Gruyere. This one was good, but not anyone’s favorite.
The final savory was filled chicken, spinach, sauteed mushrooms and red onions, sun-dried tomatoes and mozzarella, topped with fresh basil. SO amazing and definitely my favorite savory, especially with the sun-dried tomatoes.
Then for dessert, we did the same thing, except with 5 variations instead of three. Because who wouldn’t want 40% more dessert than actual dinner? 🙂
The hands-down winner was the Peanut Butter Chocolate Chip Banana filled crepe topped with Whipped Cream. The next day we added Nutella and vanilla ice cream to the mix. To.Die.For.
We also tried the traditional Lemon Juice & Honey, a delicious Strawberry, Nutella, Powdered Sugar and Whipped Cream, a very tart Mixed Berry with Cinnamon & Sugar, and the kid’s favorite Vanilla Ice Cream with Butterscotch and Powdered Sugar. Really, they were all scrumptious! Such a fun meal!!
I was surprised at how simple the crepe recipe and process actually was. I’m sure the French would find mine despicable as far as technique and texture, but for our experimental purposes it turned out very well. I used a little 8″ skillet, which worked well but I had a tendency to make them a little thick. Some turned out better than others. Kyle thought it seemed like a lot of work for the savory ones. Basically, he compares everything to steak and steak certainly takes less time and is just as delicious. But we both said that it didn’t matter how much work it took to make the Peanut Butter Chocolate dessert crepe, it was worth it and we would definitely make dessert crepes a regular at our house. Overall rating = 8.4.
-
DIY: How To Make Elastic Apple Watch Bands
Many people are not happy with the limited variety of Apple Watch bands and straps. Those who started in the Apple Watch ecosystem, but grew tired of the same old leather and steel options available, are eager to find a new way to personalize their devices. One solution is elastic band syncing, which is much more affordable than it would appear at first glance.
If you are tired of your new Apple Watch being limited to the watch bands and straps that Apple has to offer, you can take matters into your own hands. There is a relatively cheap and simple way of adding elastic band syncing to your device. The process will allow you to have a range of custom-designed Apple Watch bands 2022 that you previously could not get anywhere.
Everything You Need To Make Elastic Apple Watch Bands
You will need an elastic watch band, which is available in a variety of colors and designs. You will also need a 4 mm Allen key, which you can pick up for a few dollars at any hardware store. Finally, you will need a small pin-punch tool.
- You will start by fastening the watch band to your Apple Watch with the 4 mm Allen key on one side, then place the watch band over the other side of your device and create a loop with the excess strap.
- This is where the pin-punch will come in handy. You will need to punch a series of holes into the band so that it can be pulled through the loop. The first hole should be as close as possible to your device while still being able to pass over it. The second should be as far away from your device as possible without causing a problem, and so forth.
- When you have finished, the watch band should be able to be pulled through the loop, leaving a series of holes behind. Since you are using elastic bands, there will be some tension in this loop. Make sure that it is not too tight on your Apple Watch. The pin-punch tool is useful for stretching the band over so that it can fit through your Apple Watch.
- Once it has been stretched over your device, you need to stretch the strap so that it attaches itself to your watch. This will require a little more effort in most cases, but the watchband should now slide onto your device.
Additional Tip:
The elastic band will require some effort when trying to stretch it over the Apple Watch. One trick that can help is to extend the loop on a pair of scissors, and then stretch the band over your device using this method.
You now have a custom, elastic Apple Watch band! When you have finished and are excited to wear your new fancy watch band, you should test it out. If the loop is too tight on your Apple Watch, you can bend the loop slightly with a pair of pliers. Be careful not to over-bend the loop, or it may break.
Fortunately, today there are an increasing number of third-party band manufacturers in the market that provide Apple Watch bands filled with personalized, one-of-a-kind designs. A notable example is cxsbands.com, a website offering a variety of customized Apple Watch bands that will make you stand out from the crowd.
-
Bathroom Inspiration Ideas
Many bathrooms trends come and go but there are other designs that are built to stand the test of time. Bathrooms are our small sanctuary meaning they should be inspiring, satisfying, and above all cozy. Today’s bathrooms combine the elements of luxury, simplicity, and organic designs to create a trendy bathroom to match the home architectural design.
The article explores some of the bathroom inspiration ideas to give you a taste of the modern and trendy bathrooms you may consider during your next renovation.

Stunning Bathroom Tiles
Bathroom floor tiles are coming in many colors, shapes, sizes, and textures to give a rustic allure to your bathroom. Today one can pick ceramic, vinyl, stone, or cork tiles to give your bathroom floor an amazing look that rhymes with the house interior.
Linoleum floor tiles, for example, give your bathroom a retro look because of the limestone, cork powder, and linseed oil used to make them. They are available in different colors, shape, and size to ensure you never run out of options.
Amazing Lighting
They are many lighting styles you can use to remodel your bathrooms today. You can choose the modern style, eclectic lighting, or the traditional vanity to make your bathroom lively.
Some modern bathrooms are combining the natural lighting concepts to give you a little view of your backyard. LED strip lighting, color-changing, warm or white variety allows you to highlight the unique features of your bathroom and give a relaxing and vibrant feel to your space.
Stylish Wooden Touches
Wooden touch adds some warmth to the bathroom. You can incorporate wooden vanity and wooden framed mirrors into your bathroom design to modernize your bathroom with beautiful and practical pieces of the contemporary bathrooms. Adding a generously proportioned showerhead such as the homelody shower faucets offers you a gentle high-pressure downpour to give you a spa experience.
Decorative Mirrors
There are a plethora of beautiful mirror designs you can select to enhance the look of your bathroom. From oval, rectangle, frameless, to decorative vanity mirrors.
To make the mirrors bring an aesthetic wonder to your space position them strategically to reflect the natural light and open up or elongate the space. If you have a small space to work with, a mirror will make the room appear bigger. Have crisp white walls and dark or wooden vanity to contrast the area.
Earthy Natural Textures
Earthy colors and textures make your bathroom space feel welcoming. Add earthy accessories such as woven storage baskets and earth-tone towels. Integrating flowers or plants energize the room and purifies the air making your bathroom a natural sanctuary. You can include open shelves for your vanity to create a unique space.
Accent Wall
If you have a small bathroom, add an accent wall such as pastel blue to make your bathroom unique, thoughtful, and attractive appeal. The accent wall will make the space look more prominent, and the touch of color makes the bathroom vibrant.
There are many inspirational bathroom ideas but those are some of our best picks but you can always look for more to create your dream bathroom because the list is endless.
-
DIY Burlap Roman Shade over Mini Blinds
I love the look of burlap, I hate the look of mini blinds. Finally, I figured out how to solve both problems at once.

My mom helped me with a little DIY project that I had been procrastinating on when she visited in July. A burlap roman shade to cover the mini blinds in our dining room. I LOVE how it turned out, and since it was SO simple, I thought I’d share how to do it.
If you rent your home, rather than own it; more than likely you are stuck with the standard mini blinds hung from every window in the house. Now you could take them down and try to store them somewhere and rehang them when you leave, or you could try to talk to the landlord about installing something better, but you might want to try this option instead. It keeps the mini blinds in tact, providing shade, privacy and a happy landlord…but it also makes the room feel much more homey and you can customize it to your decorating style.
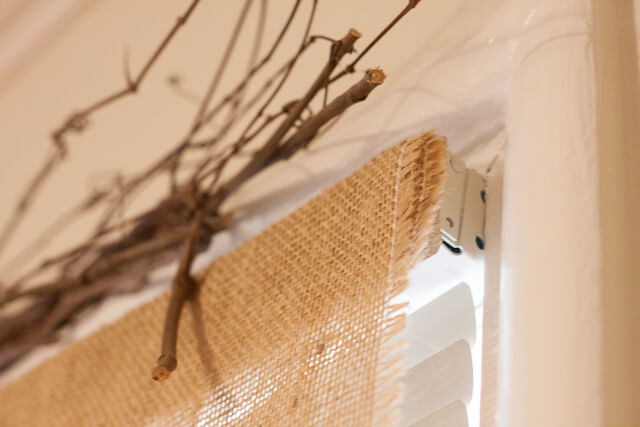
I cut a piece of burlap to the size of my window, actually to the exact width and about 2″ longer, and ironed it flat. See how to cut burlap in a straight line here. Then I folded the top down approximately 2″ to give me a finished edge and used Wonder Under to hold the folded strip down. I attached a strip of mounting tape to the back of that fold and then fastened the top of my curtain directly onto the mini blinds front facing panel. This gave me a nice, straight, finished top.

Then we used a needle and thread to tie the burlap to the actual strings of the mini blind. Once on each side and then again in the middle, making sure to carefully count how many slats were between each fold. For my curtain, we tied it at the bottom and four additional times at equally spaced intervals. We didn’t have to take the blinds down to do this, although I’m sure it looked a bit awkward as we tried to fit between the window and the shade looking for the needle in the burlap sack.

Doing it this way allows you to still use the mini blind just like before. When it is down, it looks likes a curtain, but when the blind is pulled up, the burlap poofs out and folds like a Roman shade. I especially like the look of the contrast between the curtain and the lace doily table runner. (More on the jar of popsicle sticks later)
This, {read with Rob Lowe’s voice} literally, could not be an easier curtain. Tape, needle, thread, fabric – that’s it!
-
Driving Highway 101 with Kids – Giant Redwoods
Remember us? Sorry I haven’t posted in a while; this has been a crazy month for us. Kyle’s video game is officially complete, so he was able to take some time off work and we took advantage of it. Not everything went as planned (roof rat infestation in the garage), but things were crossed off the list (kids are currently sleeping in bunk beds). However, the BIG EVENT was our 10 day camping trip up the coast along Highway 101.
Kyle has been dieing to get in the camper and just go, so that’s what we did…after some tweaking. At first, we thought we would head south to AZ and NM, thinking that South = Warm. But after taking a look at the weather, we realized that the coast would give us the warmest nights, albeit highs in the 30′s. So Kyle did some mods to the Roo (more on those later) to ensure that everyone would be warm and toasty and we headed north to see the Giant Redwoods.
The first day out, I used some travel app to find a cool place to eat lunch along side the road. It said there was a wrist wrestling monument in Petaluma and it had a picture of it similar to this.
In my mind I was picturing something like The Awakening that the kids could climb all over while we ate our little sack lunch. In stead, this is what we got. Fortunately, not all our stops were this underwhelming.
We drove until it was dark and stopped for the first night in Benbow, CA. The next morning, we woke up to an absolutely gorgeous day and enjoyed driving the awe inspiring Avenue of the Giants. After staying at the Vacation House in Pepperwood 2 years ago (when Jessie was Buzz’s age), it became one of Kyle’s favorite places. It’s hard to get a grasp on just how big these trees are, but take a look at our drive on the 101.
It truly is one of the most incredible places on earth. You cannot help but stand in awe at God’s greatness when you’re standing at the base of these trees, feeling like you’re in a real life Honey, I Shrunk the Kids. But we couldn’t stay long, we were just passing through…headed north to see what we could see.
-
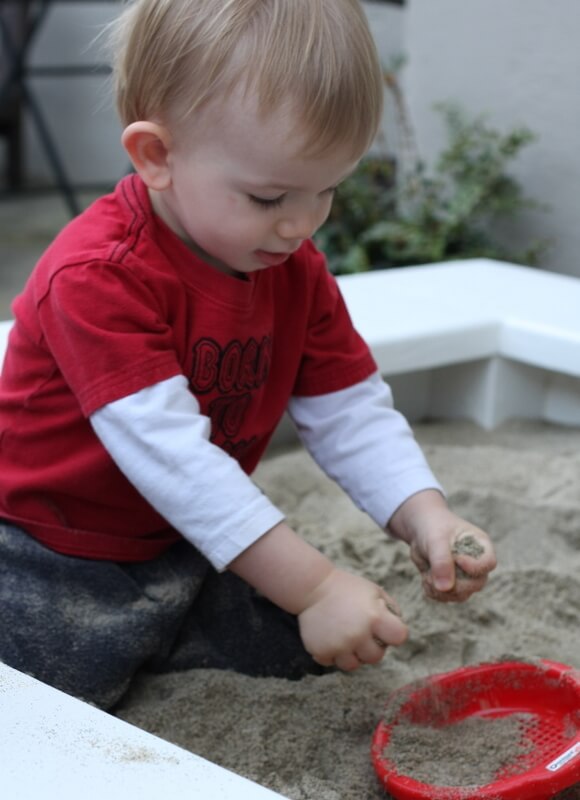
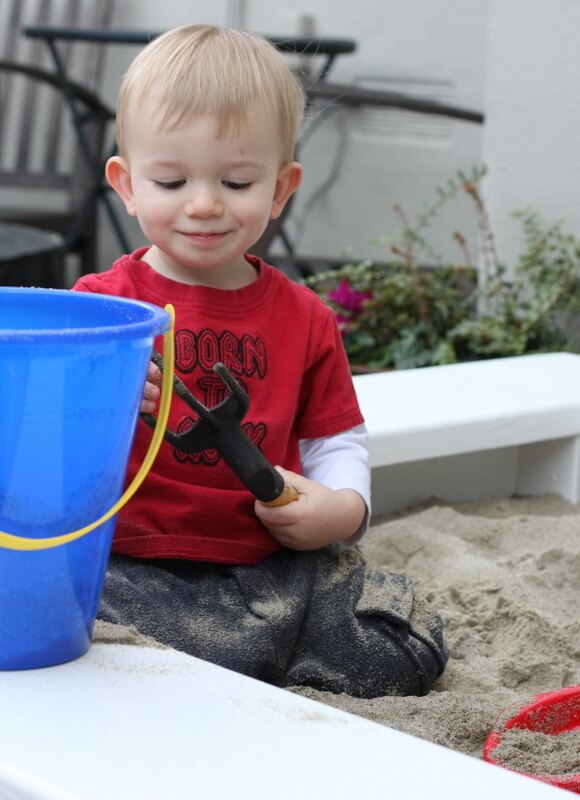
New & Improved Sandbox
When we first moved up to NorCal and I was looking for a place for us to rent, Kyle and I made a wish list of things that we wanted in our new home. We wanted to rent a house with no shared walls, we wanted a place to entertain, we wanted 2 (but hopefully 3) bedrooms, a dishwasher, a nice neighborhood…it was a long list that we didn’t think would actually be met. And then Kyle added one more thing, the impossible…a sandbox for Kade to play in. When he mentioned it, I just stared at him…and then laughed. Talk about specific! Not to mention unrealistic. Kade and I drove up and down the Peninsula looking at places for 2 months. Then, the night before we turned in an application on a house that met most of our list, an ad for this house was posted. So I decided to take a look, even though I figured we wouldn’t get it. I liked it, a lot. But I didn’t know if it was worth the money, until the agent took me outside to see the backyard. And what to my wondering eyes should appear??? A SANDBOX! It was meant to be! God provided us with a wonderful home that met each and every item on our list and so much more. The miracles He’s worked to allow us to stay here don’t stop here, but that’s for another post.
Now the original sandbox was technically a sandbox but it wasn’t usable. It had been a neighborhood litter box for who knows how long and it was basically four 2 x 12′s nailed together. The wood was warped and coming apart at the seems, literally. Here’s a picture of our yard last summer and you can see the sandbox in the lower right. Clearly, with a fire pit stored in the middle, it wasn’t getting a lot of use!

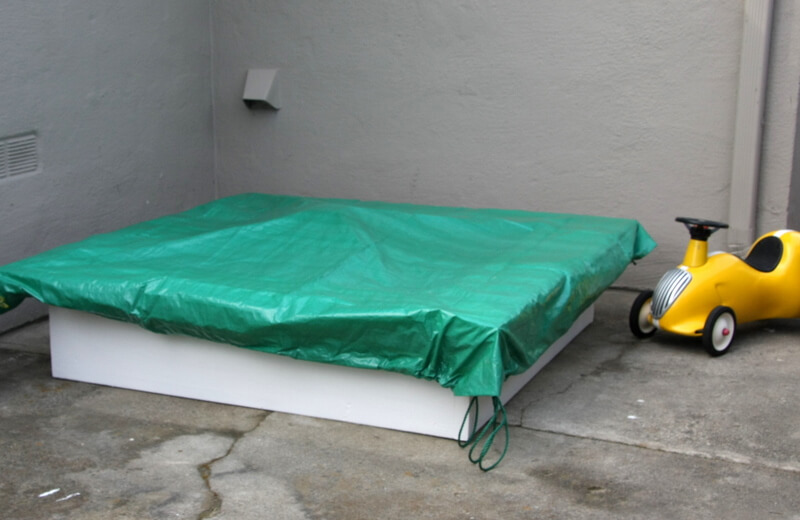
So Kyle set to work tearing it apart, cleaning up the old wood and putting it back together. Then we purchased a couple 2 x 10′s and cut them to fit like a seat around the top. Kyle made sure it was good and secure and then routed the edges to make a nice comfy seat.
We found some left over primer and then painted it to match the trim on the house. The final step was sand. I’m trying to keep this as an uplifting and happy post so I won’t rant over the cost of play sand, but lets just say Kade will NOT be throwing it out of that sandbox! To top it off, we even found a tarp with a drawstring to protect it from the neighborhood animals.
There was only one thing left to do after it was all put together…get it approved by Kade. He loved it! It was so cute to see him bury his little fingers and toes in the sand. He was a little worried at first that it was sticking to his skin, but then we showed him how to slap his hands together to brush it off. If you thought he had intense dance moves, brushing sand off fingertips is even more so!
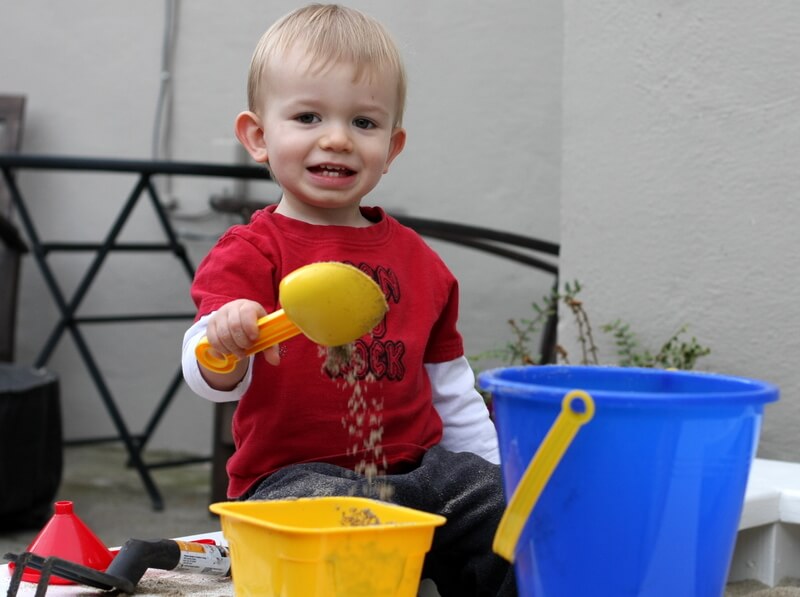
Look at that face! God is so good! He even answers the small prayers and gives us joy in the everyday things.